When I first started making podcasts and audio courses, the whole thing seemed overwhelming. I had so many questions— do I need a microphone? How do I edit? Where do I upload files? What if I make a mistake in recording? What’s the best revenge on my noisy neighbor’s barking dog?
An internet search of how-to guides gives so many options and conflicting opinions. Sifting through all the “Top 10 Best Microphones to buy” articles alone will take you days. Deciding which one of them is more correct takes another year. If you’re not quite the decisive kind, like me, the information overload just makes you want to give up the whole project all together.
Now after dozens of microphone tests, hundreds of recording hours, and numerous coaching sessions helping other audio creators, I'm writing this article for you—the brilliant creator who wants to get your voice out in the world as efficiently as possible.
This is the article I wish I had read when I got started, so that I could get to doing what I do best, i.e. creating, as quickly as possible, without being bogged down by technical details.
I’m going to tell you what I find is the fastest and easiest way to start making quality audio, including recording gear, setup, recording and editing processes. I’m not going to overwhelm you with a lot of options in each category and that’s deliberate. Because again, my purpose is to save you the research time which is mostly wasted anyway. The truth is you need very little to start making quality audio that sounds good enough for the mass. If your goal is to win an Oscar for best sound quality (does that even exist?), get out of here. Otherwise, read on.
1. Microphone
“Do I need one?”
“Yes.”
“Which one?”
The most crucial step to make yourself sound good is to get a good microphone. And Audio-Technica ATR2100 is hands-down the best thing you can buy with $65. It’s light, sturdily built, not precious, sounds amazing, and can make you poop rainbows. Ok, maybe not the last one. It seriously sounds better than many others that cost over $300. (And if you really spend $300 on a microphone for recording spoken words…why? I can’t think of any reason, other than you trying to overcompensate for feeling extremely insecure about your content. If that’s the case, we need to talk.)
The other important thing is that it’s a USB mic. You can plug it into your computer or phone with a USB cord and start recording immediately. (Do NOT get a XLR mic. They sound a little better but are not worth the additional trouble to set up. If you don’t know what an XLR mic is, pretend you didn’t read this.)
Some great microphones that are regularly recommended by experienced audio creators do not appear on my list of one, for various reasons. For example, many people tell you to get a Blue Yeti, which, while making loud beautiful sound, picks up tons of background noise. If you’re recording in a sound-proof studio, no problem. But I assume you’re recording at home sitting in a squeaky chair with your bedroom window open, no? So, go get an ATR2100 already.
(This is a side note you don’t actually need to read: as a rule of thumb, “condenser” mics sound a little better, but also pick up more background noise than “dynamic” mics. That’s why you want the latter for your non-studio recording.)
Now I’m hesitant to recommend this…but if you’re feeling extremely fancy, get an Audio-Technica AT2020USB+. It sounds 15% better than the ATR2100, but costs 100% more. It’s your call. And if you want to get anything more expensive than that, you’re just addicted to shopping on Amazon, which is fine by me. Really. Worse things have happened to mankind.
2. Accessories
It’s called an accessory because it’s not necessary (tweet this?). Like any other accessories, they’re here to make life a little more pleasant, but you won’t die for the lack of them. If you hear an inner voice saying “I can’t record anything today because I don’t have a pop filter yet…”, I guarantee you that’s a lie. It’s simply a symptom of what I call “creator’s cold feet”— you’re anxious about putting your content out there, so you’re looking for an excuse to not do it.
Don’t listen to lies and don’t let anything stop you from creating, especially not a pop filter. That being said…
Pop Filter
This is a little thingy you put in front of your mic to help soften your “p” and “s” sound, which most microphones have a hard time dealing with. Without it your “potatoes” and “snakes” could blow some of your sensitive audience’s ears out. Ok, it’s really not that terrible. Again, this is not a must-have. If you want it, get a cheap one that costs a few bucks. This is the one I use.
Mic Stand
If you get an Audio-Technica ATR2100, you can simply hold it in your hand as you talk (it’s called a “hand-held” mic for a reason). But there are times when your hands may be busy…you have notes to flip through, you like to gesture when talking, you’re typing on your computer, you’re doing pushups while you record (if you do, let me know how it goes). That’s when a mic stand comes handy. Just make sure you get one that is easily foldable with adjustable height. Nothing fancy to find here. This is the one I use.
Other Accessories
“Do I need a mixer?”
“No.”
“Do I need an audio interface?”
“No.”
“Do I need a preamp?”
“I said no. Get to recording already!”
3. Recording Setup
You got your mic. You got what you need to say. It’s time to actually record something. Anything. You can do it either on your computer or on your mobile device. The latter has its advantages—you can record wherever you are—but it does involve a couple more steps. But don’t worry. Nothing complicated here.
Recording on computer
Mac:
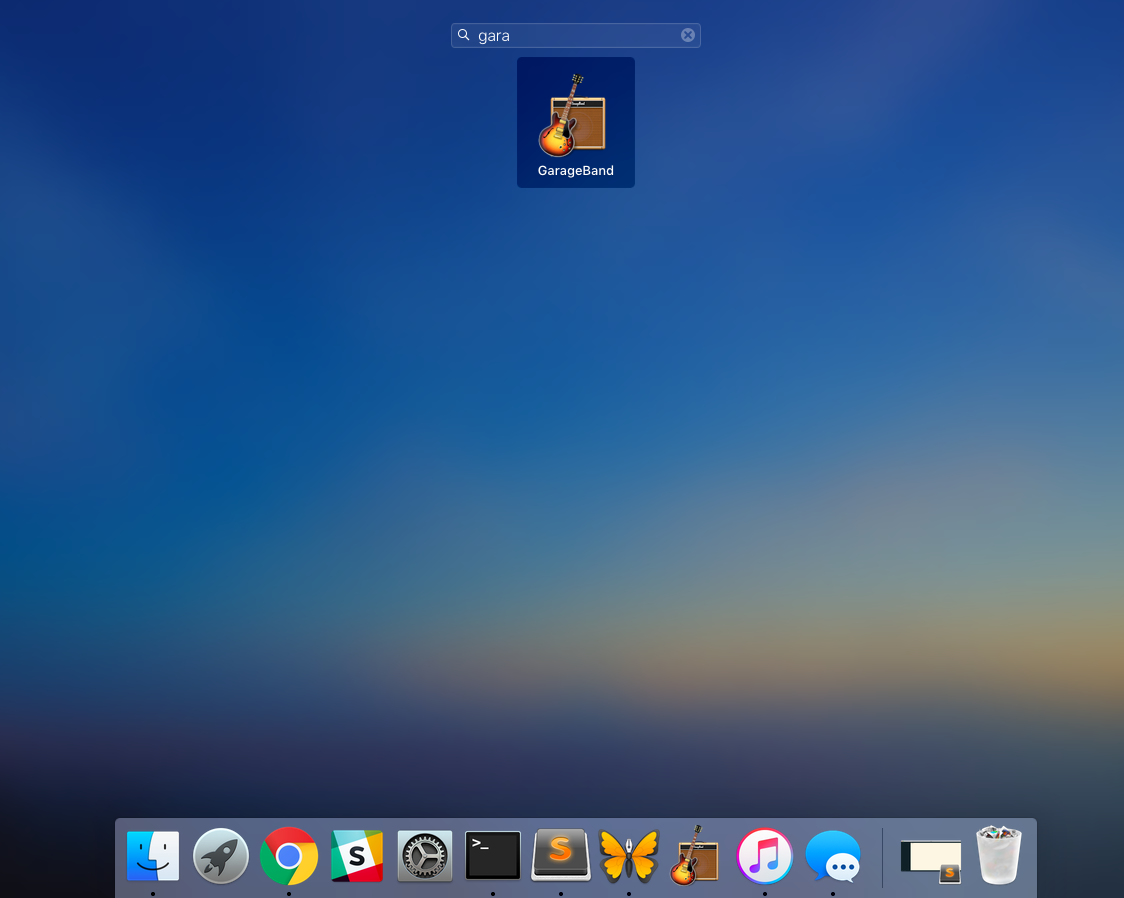
Your mac computer comes with Garage Band for free. It’s more than enough for your basic recording and editing needs. If you’ve never used it before, follow these steps:
- Click on Launchpad on your home screen.
- In the search bar that shows up on top, type in “garage band”.
- Make sure you have the mic plugged into the computer with a USB cord.
- Click open Garage Band, and pick “Empty Project” in the options that show up (it should be the first option).
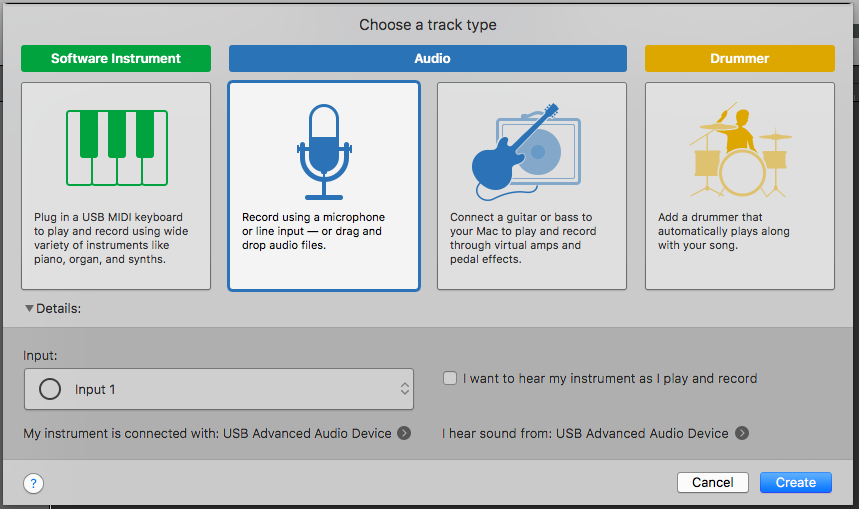
- In the pop-up window that says “Choose a track type”, choose “input 1”. And in “My instrument is connected with:”, pick your usb microphone if it’s not auto-selected already. If you want to hear the sound while you record, you can plug your headphones into your mic, and choose your mic in the “I hear sound from:” option as well.
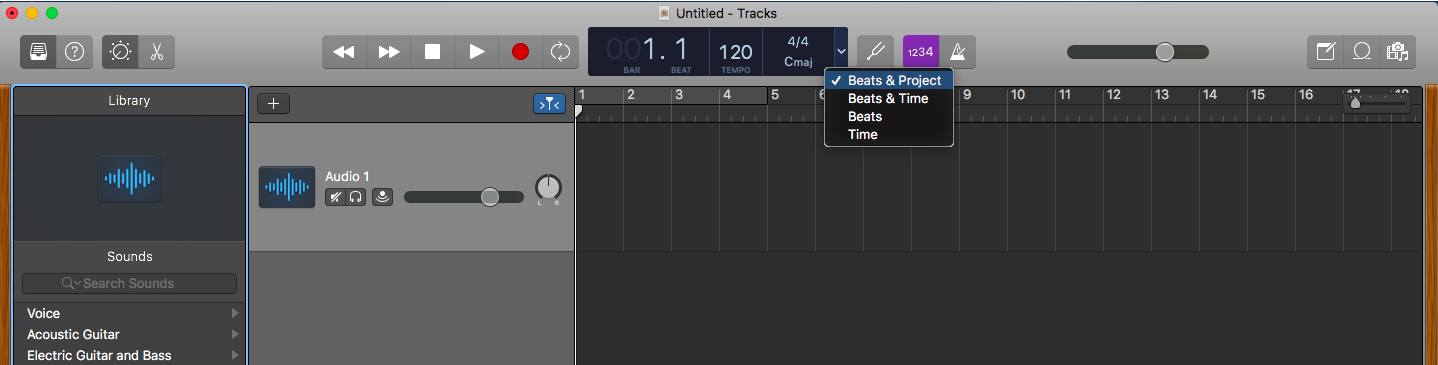
- In the recording interface that opens up, make sure you tick off the recording meter (purple square in middle top), otherwise you’d hear ticking sound throughout your recording. And select “time” in the beats/time options. This way you can easily see how long you’ve recorded.
- Press the red round recording button and you’re on!
- When you’re done, simply press the space key on your keyboard and the recording will stop.
Windows:
Windows comes with a free Sound Recorder app. To use it:
- Click on “Start” and then “All Programs”.
- Open the “Accessories” file then click on “Sound Recorder”.
- When the new window opens, connect your microphone with your computer and then click on “Start Recording”.
- After recording, click on “Stop Recording” and then save the audio file wherever you want.
- The Sound Recorder, however, doesn’t allow you to edit the recording. So if you want to do some light editing right after you record, get Audacity.
Recording on mobile
It’s rather easy to record on your phone these days and you have many recording apps to choose from. But first we need to take care of two things:
- to connect your USB mic to your phone.
- to transfer your recorded files to your computer so that you can upload it somewhere else.
For the first task, all you need is a little USB-to-phone connector. That means
- for iPhone, a lightening to USB adaptor
- for Android, a micro USB adaptor
For the second task, you will need a cloud storage account, i.e. Dropbox, Google Drive, Box, iCloud. Once you have that, you can set it up so that the files are uploaded from your recording app to your cloud storage account, which you can access from your computer later. That brings us to:
Recording Apps
Do a search for “audio recording app” in the App Store or Google Play Store, and you’ll find many. But we need one that can directly upload to a cloud storage account.
If you are on an iPhone, please do NOT use the Voice Memos app that comes with the phone. It doesn’t pick up external microphones very well for some reason, at the time of this article.
Instead, the Voice Recorder & Audio Editor is a free iOS app I use to record on my phone. It’s relatively easy to use, and you can upload to your cloud storage accounts from the app. There’re other apps that have similar features. (Because these are, after all, just recording apps. They record. Period. What else do you expect? Diamonds?)
If you’re on Android, check out Voice Recorder.
4. Recording process
Be Steady
Once you start recording, try not to shift your mic around. Your mic may complain by making weird sound and the complaint will be mixed in your recording, which is nearly impossible to edit out later (good reason to get a mic stand).
Also, try not to change the distance between your mic and your mouth throughout your recording. That means keeping random head turning and rocking back and forth to a minimum. If you’re using an ATR2100 or any mic with cardioid pattern, it only picks up sound that’s right on top of it. Random distance change will make your volume uneven and hard to listen to.
Start Practicing Immediately
You’ll probably feel silly the first time you hold a microphone to your face and try talking to it. I don’t blame you. It’s a weird thing to do. But I want to remind you that it also felt weird the first time you held a toothbrush and tried to clean your teeth with it. Ok, it was a long time ago. You don’t remember. But trust me, it was weird.
And recording yourself talk is no different— it becomes easier the more you do it. And before you know it, it begins to feel more natural than brushing your teeth. That’s why the best recording advice I can give you is—
Practice. Practice. Practice.
Don’t wait till you have all your equipments lined up and expect yourself to do it perfectly from the get go. Start talking to a mic whenever you can. Play with it. Have fun with it.
Ultimately, your audience cares about your content. They don’t expect you to sound as smooth as a radio DJ. But they do expect you to be an expert/authority in whatever you teach them. If you’re nervous about how you sound, you will sound nervous. And your audience starts to wonder if you really believe in your materials, why do you sound stiffer than a corpse? While the truth is you simply haven’t practiced recording enough! No, I don’t want that to happen, either.
Don’t Fuss
On the other hand, don’t make a big deal out of it when you stumble on your words, have to pause and think, or misspeak something and have to correct yourself. You make mistakes in your daily conversations, too. But you never give a second thought about those, don’t you? If you speak, you’ll make mistakes. It’s normal. Your audience understands that. And mistakes and fillers—to a reasonable extent of course—can actually make you sound more relatable.
I’ll talk more about this in the editing section. But the bottomline is this: if you feel like you’re speaking naturally, you put your audience at ease, too. If you don’t give a shit about misspeaking a word, your audience probably won’t care, either.
Talk To A Person
When I record a teaching, I like to imagine that I’m talking to a friend who is sitting right in front of me and I like her very much. It’s a practice that can help you relax and sound more conversational. It also adds to your recording more “presence”, which is this intangible thing I can’t quite put into words. But when it’s there, people can hear it. And they can’t help but being drawn to it. It’s like when you’re talking to someone in person, you can tell whether they’re really there or not.
Presence is what differentiates you, an expert who’s human, from Siri, Alexa, and other sexy-sounding robots. It has an additional impact on your audience beyond the logical transmission of information. So if you don’t want Siri to take your job one day, try having more presence.
A customer of Soundwise once told me that she didn’t like her voice on tape. So she had decided that she needed a voice coach before recording her program... Oh, the brilliant lies we creators tell ourselves!
The truth is she sounded just fine in person. She sounded worse on tape not because of a voice problem, but a combined result of not feeling comfortable talking to a mic and the fear of putting herself out there. The former can be resolved with more recording practice. The latter needs to be cured with a self-imposed kick in the butt.
If you want to be a productive audio creator (or any kind of creator), you need to train your ears. Not for beautiful sound. But for lies you tell yourself— excuses that stop you from making things and shipping things. I’ve heard them all:
“I’m not ready”, “I don’t have time right now”, “I don’t have an audience”, “I’m having a cold”, “I’m not good with gadgets”, “It’s a snow day”, “It’s Christmas”, “I live in NYC and it’s never quiet”…
I try not to tell this to people’s face because my mom says I should be more tactful. But seriously, give me a f**king break! If you have a message that can help someone, it’s not your right to refuse sharing it. The world needs you and your material to educate, to transform, to inspire, to enlighten. And you’re keeping it to yourself because you don’t think it makes you look good enough? Grow up!
Ok, I’m done with the rant. Next.
5. Editing and Presentation
You just recorded something. Yay! If you recorded using Garage Band, you may want to cut out any unnecessary parts right after, e.g. excessive silence, blank parts at beginning and end. I’ve made a little screencast video here that shows you how to cut and trim in Garage Band.
It’s actually rather simple. Here’re the steps:
- click on your recording to select it (it should be highlighted)
- move the cursor to the part of the recording where you want to begin cutting.
- press “command + t” on your keyboard (holding down on the command key and then press t). This will split the audio in two at the point of your cursor.
- move the cursor to the point where you want to end cutting.
- press “command + t” again.
- Now you have the middle part (the part you don’t want) separated out. Click on it to select the part.
- press “delete” on your keyboard.
- drag the part that comes after the deleted segment with your mouse/keypad, to merge the recording gap left from the deletion.
- that’s all!
After you’re satisfied with the edited file, click on “Share -> Export song to disk” from the top menu bar. From there you can export the audio into a mp3 file and save it in whichever folder you want on your computer. You’ll be asked to pick export quality (i.e. 64 kBit/s, 128 kBit/s, etc). For spoken words, 64 kBit/s is quite enough, and you definitely don’t need anything higher than 128 kBit/s.
But you ask: do I need to add intro music? Do I need other editing? Here’re some tips.
Don’t Over Edit
The perfectionist in you may feel tempted to edit out every pause, breather, hmm and uhh in your recording. Don’t!
First, such detailed editing is very time consuming and kind of a tedious task. If you attempt it on your own, what’s likely to happen is that you edited one recording so perfectly, but you don’t feel like making another one because it was too exhausting! It’s a creativity killer and annoyance maker.
Secondly, as I mentioned in the section above, some level of imperfection actually makes you sound more human and relatable. It creates a more intimate experience—which is what audio medium is all about—for your audience when they don’t feel like you’re sitting on a very polished pedestal. Mind you, this is not an excuse for creating sloppy materials. All I’m saying is that you don’t need to sound like NPR to win the heart of your audience, as long as your message is useful.
Go Easy On Intro/Outro/Music
Many podcasters feel like they need an intro with original music and professional voiceover to announce their show, to make it sound more like professional radio. I’m not saying that’s wrong. But your return on investment in an expensively made intro is probably limited. And here’s why.
Podcast and audio course listeners have different expectations than your traditional broadcast listeners. They’re looking to you for valuable information that solves a problem. And that’s what you should focus on: does your material help solve a problem and improve life in a specific way for your audience? If you don’t have a good answer for that, anything else is irrelevant.
And a long intro/outro actually becomes a hassle for your audience if they are the same for every episode/recording. Your audience is busy. That’s why they turn to audio—to easily learn something on the go. So don’t waste their time with the same intro that goes on and on. If you’re hosting your podcast/audio course on Soundwise, you can easily see if your intro is working. Because the stats will show you how long each of your listeners has listened, for every episode. If your intro is 1 minute long, and the average listening length of your episodes is 1 minute and a half, you have a problem. Your audience is bored by your intro and you need to cut it down.
Find Help
One way to focus your energy on creating instead of technical details is to find help to do the latter. If your recording is of good quality and you don’t need to cut anything out, you can use a machine editing service such as Auphoric to lightly polish your recording (e.g. normalize volume, reduce hums).
If you need any editing that requires human ears (e.g. cut out mistakes), you can find plenty of freelance audio editors on Fiverr at a reasonable price. On the site you can also easily find someone to design a podcast cover art for you, compose original background music, and record an intro for your show.
Your job as a content creator is to create. Leave other jobs to other people who do it better.
5. Out Into The World
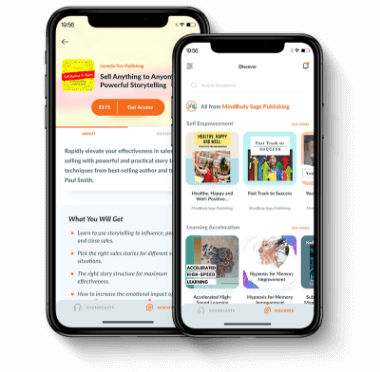
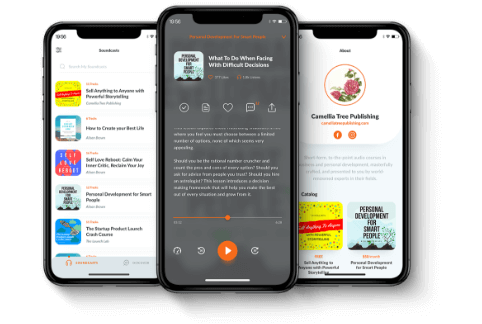
You have recorded and edited your audio program. High five! Now it’s time to put it out into the world. You can, of course, make a Wordpress or SquareSpace website, and host your podcast/audio course on your own site. The smarter way, however, is to put your recordings on a dedicated audio content management platform like Soundwise. Soundwise makes it super easy for you to publish either free or paid audio content, with many advantages that hosting elsewhere would not give you:
- Build your email list: You get the name and email address of everyone who subscribes to your program on Soundwise.
- Comprehensive stats: You will know exactly who has listened to what, down to each subscriber/student.
- Easy monetization: You can create paid audio programs with a few clicks, and customize however you want (subscription, one time charge, or limited time access).
- Mobile access: Your audience can listen to your free or paid programs both on our mobile apps and on the web.
- One-click podcast publication: No more messing around with creating rss feeds. Soundwise can generate a podcast feed for any of your free programs, and submit it to iTunes and Google Play without you lifting a finger.
Oh and one more thing. This is important: after you create an audio program, how are you going to make people know that it exists? How are you going to get people to sign up or buy your audio materials, especially if you don’t have any existing audience? I’m going to talk about that in another article. Stay tuned.